Suede looks soft and rich when it is cared for and tired when it is not, and most of the damage people do to it comes from treating it like smooth leather or canvas.
Learning how to clean suede shoes is mostly about restraint. Suede does not want soaking, scrubbing with a wet rag, or a trip through the washing machine. It wants dry brushing, gentle spot work, patient drying and a little prevention. This guide covers what suede actually is, the kit that helps, step-by-step methods for everyday dirt, scuffs, water marks, oil and salt, what to avoid, and how to keep a pair looking good between cleans. If you are working on a secondhand pair, our hub on How to Clean Shoes from the Thrift Store covers the first clean and freshen-up for every shoe type, and this page goes deeper on suede alone.
One honest note before the steps: there is no single official method for cleaning suede. Most of what follows is a common method that shoe-care retailers and cobblers widely describe, not a rule from a standards body. Suede also varies a lot between makers in dye, thickness and finish. So two habits run through every section below: check the maker’s care instructions first, and test anything new on a hidden spot, such as the inside of the heel or the tongue under the laces, before you touch the visible parts of the shoe.
What suede is, and why it needs different care
Suede is leather finished with a napped surface, meaning the fibres are raised and brushed so the material feels velvety. SATRA, the footwear and leather research organisation, describes suede as leather “finished by abrasive action on the flesh side of the full skin to create a velvet-like suede appearance.” In plain terms, the soft side you see is the underside of the skin, roughed up on purpose.
That raised nap is what makes suede look and feel the way it does, and it is also why suede behaves so differently from smooth leather. Smooth leather has a closed grain surface that a cleaner can sit on and wipe off. Suede has thousands of tiny fibres that trap dust, soak up liquids and flatten under pressure. A wet cloth that would lift dirt off a polished shoe can push dirt deeper into suede and leave a dark ring as it dries. A heavy hand with a stiff brush can pull fibres out and leave a bald patch.
Suede vs nubuck
Nubuck often gets lumped in with suede because both have a soft, brushed feel. The difference is which side of the skin is worked. Trade descriptions generally say nubuck is cowhide buffed on the grain side, the outer surface, rather than the flesh side. The result is usually a finer, tighter nap than suede. In day-to-day care the two are handled in a very similar way: dry brushing, gentle erasing, blotting rather than rubbing, and no soaking. If a shoe is labelled nubuck, the same steps below apply, but go even more gently, since a finer nap can show brush marks more easily.
Suede vs leather-look materials
Not everything that looks like suede is suede. Microfibre and other synthetic “suede-look” uppers are common on trainers, boots and fashion shoes. Under the FTC Guides for leather products in the US, it is “unfair or deceptive to use the unqualified term ‘leather'” unless a product “is composed in all substantial parts of leather,” and imitation materials should be disclosed with terms such as “Not leather” or “Vinyl.” So check the label, the box or the insole stamp. Synthetic suede-look materials may tolerate different cleaners from real suede, and some are machine washable while real suede is not. The maker’s care instructions settle it.
What you need
A basic suede kit is small and inexpensive. You do not need everything on this list, but each item has a specific job.
- A suede brush. Usually a combination brush with soft bristles on one side and brass or rubber bristles or crepe on the other. The soft side lifts the nap and removes loose dust; the firmer side works on flattened areas. A suede brush is the single most useful tool here.
- A suede eraser. A rubbery block that works like a pencil eraser on scuffs, shiny patches and dry marks.
- Clean, dry, white cloths or paper towels. For blotting fresh spills. White avoids any dye transfer onto the shoe.
- Cornflour or talc. A common household absorbent for fresh oil and grease marks.
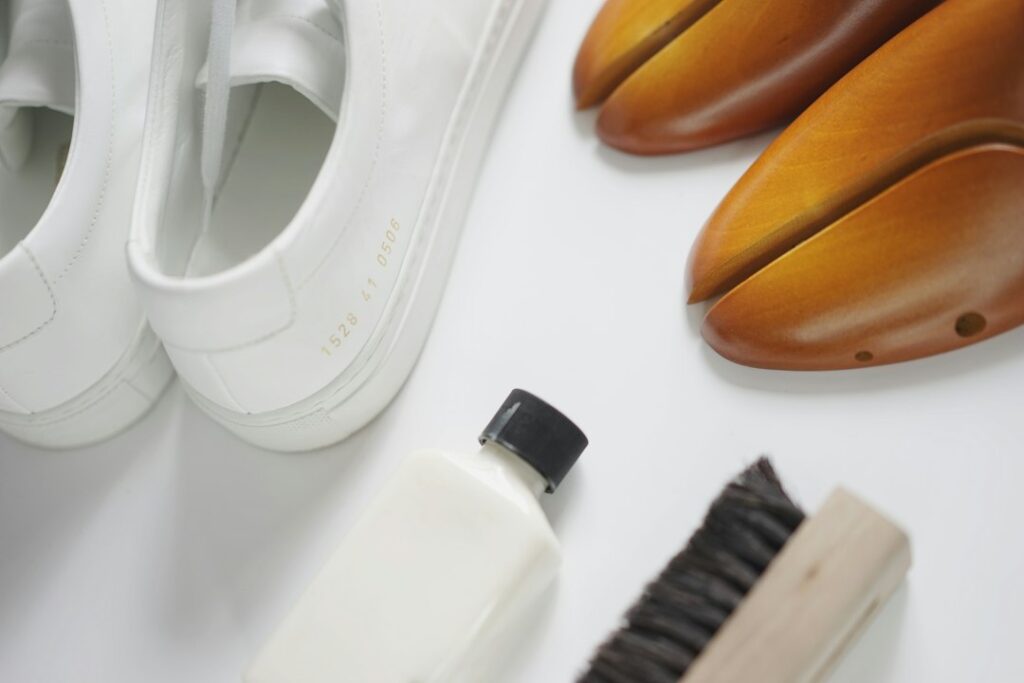
- Shoe trees or plain paper. To hold the shape while the shoe dries.
- A suede cleaner made for the purpose, if the maker’s instructions allow one, for marks that dry methods cannot shift.
- A suede protector spray, applied before wear after a patch test.
Many shoppers buy these as a set. A Suede Shoe Brush Eraser Kit on Amazon usually bundles the brush and eraser together, which covers most routine care.
Top-selling match on Amazon

- Suede Handle Brush: The Suede Handle Brush gently cleans and protects the buttery nap on your favorite…
- Unique Compositions: Our handcrafted beech wood brush is made with soft horsehair bristles to provide…
- Shoe Stain Eraser: The eraser effectively removes tough dirt from suede shoes easily.
How to clean suede shoes: the basic routine
This is the routine for shoes that are dusty, a little dull or lightly marked but have no specific stain. It is a common method, done dry, and it is where every suede clean should start. Many stains look worse than they are until the loose dirt is off.
Step-by-step: dry brushing
- Check the maker’s care instructions on the box, label or brand website.
- Make sure the shoes are completely dry. If they are damp, stuff them with paper and wait.
- Remove the laces so you can reach the tongue and eyelet area.
- Insert shoe trees, or stuff the shoes with paper, so the surface is firm to work on.
- Knock the soles together outdoors to shake off loose dirt and grit.
- Brush the whole upper lightly with the soft side of the suede brush, in one direction, to remove dust.
- Brush again in short back-and-forth strokes to lift flattened areas of nap.
- Look over the shoe in good light and note any marks that are still there.
- Finish by brushing everything in one direction so the nap lies evenly.
Light pressure matters more than speed. If you can hear the bristles scraping, ease off. The aim is to stand the fibres up, not to remove them.
Step-by-step: scuffs and shiny patches
Scuffs, and the shiny, flattened patches suede develops at the toe and heel, usually respond to an eraser. Again, this is a common method rather than an official one.
- Dry brush the shoe first, as above.
- Test the suede eraser on a hidden spot to make sure it does not change the colour.
- Rub the eraser over the scuff with small, light strokes.
- Brush away the crumbs with the soft side of the brush.
- Repeat with slightly more pressure if the mark is still visible.
- Use the firmer side of the brush on flattened, shiny areas to raise the nap.
- Brush the whole panel in one direction to blend the treated area.
Some people use a clean pencil eraser in a pinch. It can work on small marks, but test it first, since coloured erasers can leave residue.
How to get stains out of suede
The golden rule for spills is the same across nearly every suede-care guide: blot, do not rub. Rubbing spreads the liquid through the nap and pushes it in. Each stain type below has its own common method, and none of them works on every suede, so start gently and test first.
Water marks and rain spots
Water itself does not usually ruin suede, but it can leave rings and stiffness as it dries unevenly. A common approach:
- Blot fresh water with a dry white cloth straight away.
- Stuff the shoes with paper or insert shoe trees to hold their shape.
- Let them dry naturally at room temperature, away from radiators, heaters and direct sun.
- Once fully dry, brush the nap back up with the soft side of the brush.
- If a tide mark remains, some people lightly and evenly dampen the whole panel with a barely damp cloth so it dries in one even tone, then repeat the drying and brushing steps. Test this on a hidden spot first, since it can darken some suede.
Never speed things up with a hair dryer or by putting shoes on a heater. Direct heat can shrink, stiffen or crack the leather underneath the nap.
Oil and grease
Oil stains are the hardest on suede because oil soaks in fast. Act quickly if you can.
- Blot away as much fresh oil as possible with a dry paper towel.
- Sprinkle a generous layer of cornflour or talc over the mark.
- Leave it to sit for several hours, or overnight, so the powder draws the oil up.
- Brush the powder off gently with the soft side of the brush.
- Repeat with fresh powder if the mark has faded but not gone.
Old, set-in oil stains may not come out fully at home. A specialist shoe cleaner or cobbler is the next step for a pair you care about.
Mud
Mud is easier than it looks, provided you resist the urge to wipe it while it is wet.
- Let the mud dry completely.
- Knock or gently flake off the dried chunks.
- Brush the area with the firmer side of the brush to remove the rest of the dried dirt.
- Use the suede eraser on any remaining stain.
- Finish with the soft side of the brush to even out the nap.
Salt lines from winter streets
White salt tide marks are common on suede boots in winter. Many people treat them with a cloth barely dampened with a mix of water and a little white vinegar, dabbing rather than rubbing, then letting the boot dry naturally and brushing it afterwards. Treat this as a common household method, not a sure fix: vinegar is acidic, so test it on a hidden spot first, and never mix vinegar with bleach or other cleaners. If the maker sells or recommends a specific suede cleaner, use that instead.
Ink, wine and other dark stains
Strongly coloured stains are the riskiest to treat at home. Blot what you can while the stain is fresh, then try the eraser once it is dry. Beyond that, a suede cleaner made for the job, used exactly as directed after a patch test, is the safest home option. If the shoes are valuable or sentimental, take them to a professional before trying anything stronger.
Deep cleaning with a suede cleaner
Sometimes a pair is dingy all over rather than marked in one place. A dedicated suede cleaner, often a foam or liquid applied with a brush, can help here. Steps vary by product, so the instructions on the bottle come first. A typical sequence looks like this:
- Dry brush the whole shoe to remove loose dirt.
- Test the cleaner on a hidden spot and let it dry fully to check for colour change.
- Apply a small amount of cleaner to the brush rather than straight onto the shoe.
- Work it in gently over a whole panel at a time, so the panel dries evenly.
- Blot away excess foam or moisture with a clean cloth.
- Stuff the shoe and let it dry at room temperature away from direct heat.
- Brush the nap up once it is dry.
Cleaning one small spot with a wet product can leave a lighter or darker patch, which is why working panel by panel tends to give a more even finish. A Suede Cleaner Foam on Amazon is the kind of product to look for, but check that it is labelled for suede and nubuck.
Top-selling match on Amazon

- Convenient Foaming Cleaner: Ready-to-use straight out of the bottle—no extra water needed; just pump, scrub, and…
- Versatile Cleaning Solution: Safe for most colors and materials including leather, suede, nubuck, canvas, cotton…
- Easy Application: Dry brush material to remove any loose dirt. Apply foam directly onto brush and…
How to clean suede trainers
Suede trainers, including the many classic court and terrace styles with suede uppers, mix suede panels with rubber soles, mesh, canvas or smooth leather. That makes them a little more work, because each material wants different treatment.
- Remove the laces and wash them separately by hand in warm soapy water.
- Dry brush the suede panels as in the basic routine.
- Use the eraser on scuffs on the suede.
- Clean the rubber sole and midsole separately with a cloth or soft brush and a little soapy water, keeping water off the suede.
- Wipe any smooth leather panels with a barely damp cloth.
- Stuff the trainers with paper and let any damp areas dry naturally.
- Brush the suede once more, then re-lace.
Resist the machine. Consumer Reports says washing sneakers in a machine “could loosen the shoes’ adhesives or deform their structure,” and lists leather and suede among things that should not go in a washing machine. It also notes that Nike and Keds say not to machine-wash or machine-dry their shoes, and its advice is to “be sure to follow the manufacturer’s cleaning guidelines.” For white trainers specifically, our guide to How to Clean White Shoes and Sneakers covers soles, canvas and leather in more detail.
What to avoid with suede
Most suede disasters come from a short list of mistakes. Steer clear of these:
- The washing machine and dryer. As Consumer Reports notes above, suede is on its list of things to keep out of the washer. The tumble dryer adds heat on top.
- Soaking or scrubbing with a wet cloth. It can leave rings, stiffness and colour loss.
- Direct heat for drying. No hair dryers, radiators or heaters. Room temperature and patience are safer.
- Chlorine bleach. It should not go near leather or suede, and it can strip colour and damage the fibres.
- Mixing cleaning products. Never mix bleach with vinegar, ammonia or other cleaners. Use one product at a time and rinse or let it dry before trying another.
- Smooth-leather polish and creams. Wax and cream polish meant for smooth leather will mat down the nap and darken suede.
- Rubbing fresh spills. Blot first, always.
- Skipping the patch test. Dyes, erasers and cleaners can all behave differently on different suede.
Protecting suede before you wear it
Prevention saves most of the work above. A suede protector spray applied before the first wear, and topped up from time to time, is a common step that many cobblers and retailers recommend. These sprays aim to help liquids bead on the surface for a short time so you can blot them before they soak in.
Read the label carefully. Under the FTC Leather Guides in the US, the word “Waterproof” is allowed only if the material keeps water out under normal use “during the anticipated life of the product.” A protector spray is not the same as making a shoe waterproof, so treat it as extra time to react, not as a reason to wear suede through puddles.
A typical application, following the can’s directions:
- Start with clean, dry, brushed shoes.
- Work outdoors or in a well-ventilated space.
- Patch-test the spray on a hidden spot and let it dry to check the colour.
- Hold the can at the distance the label gives and spray an even, light coat.
- Let the shoes dry for as long as the label says.
- Add a second light coat if the instructions suggest one.
- Brush the nap once the spray is fully dry.
A Suede Protector Spray on Amazon labelled for suede and nubuck is the type to look for. Avoid sprays meant only for smooth leather or fabric unless the label also lists suede.
Everyday maintenance
A few small habits make the deep-clean steps rare.
- Brush after wearing. A quick pass with the soft side of the brush after each wear stops dust from building up in the nap.
- Use shoe trees. SATRA describes a shoe tree as “a device placed inside footwear to try to preserve its shape and prevent creases from developing.” It adds that wooden trees “are said to” wick away foot moisture, and that cedar is “reportedly” chosen to absorb moisture and help control odour. Unvarnished wooden trees are a popular choice for suede shoes and boots for that reason.
- Rotate pairs. Giving suede a day off lets any foot moisture dry out between wears. This is common shoe-care advice rather than a sourced rule.
- Check the forecast. On heavy rain or slushy days, many people simply wear a different pair.
- Store them well. Keep suede somewhere cool, dry and out of direct sunlight, which can fade dyes. A breathable cloth bag keeps dust off; sealed plastic can trap moisture.
- Top up protection. Reapply protector spray as the label suggests, usually after a deep clean.
Suede boots, loafers and other styles
The steps above work across suede footwear, but a few styles have quirks worth knowing.
Western and cowboy boots. Suede western boots often have a lot of surface area and stitched detailing. Brush along the direction of the nap between stitch lines, and give tall shafts boot shapers or rolled paper while they dry so they do not slump and crease. Our guide to Suede Cowgirl Boots covers styles and fit.
Chelsea boots. The elastic side panels should be kept away from suede cleaners and protector sprays unless the product says it is safe on elastic. Brush around them rather than over them. See Women’s Chelsea Boots for styles.
Loafers and driving shoes. These often show wear at the heel and toe first. The eraser and firm-side brush on shiny patches are the main tools. For outfit ideas, see Loafers Outfit Ideas.
Suede with a shearling or fleece lining. Keep cleaners and moisture to the outer suede, and let linings air out between wears. Specialist cleaners exist for lined boots; follow the maker’s guidance.
Cleaning thrifted suede
Secondhand suede can be one of the best finds on a thrift rack, since well-made suede shoes and boots often have years of wear left in them. It also tends to arrive dusty, flattened and sometimes marked. Before you buy, check the basics: is the nap worn through to the backing anywhere, are there hard, cracked patches from past water damage or heat, and do the soles and stitching hold up? Flattened nap and surface dirt usually brush out; bald patches and cracking generally do not.
At home, start with the dry routine above, then work through any specific stains one at a time. Air the shoes out for a day or two before cleaning, since secondhand footwear can hold odours. Our How to Clean Shoes from the Thrift Store hub covers deodorising insoles and freshening the inside of secondhand shoes, and Thrift Store Shoes has tips on what to look for in the aisle. If a thrifted pair is a little snug, our guide on How to Stretch Shoes That Are Too Tight explains the common options, and for smooth-leather pairs see How to Clean Leather Shoes and Keep Them Conditioned.
When to see a professional
Home methods have limits. Consider a cobbler or specialist shoe cleaner if:
- A stain is large, old or dark and has not shifted after gentle attempts.
- The suede has been soaked and dried stiff, or has started to crack.
- The shoes are expensive, designer or sentimental.
- You want the colour restored or the suede re-dyed.
- The soles, heels or stitching need repair at the same time.
A professional can also re-nap worn areas with tools that most people do not have at home.
Frequently asked questions
Can you put suede shoes in the washing machine?
Generally no. Consumer Reports lists leather and suede among things that should not be machine-washed and says washing sneakers in a machine could loosen adhesives or deform their structure. Some synthetic suede-look shoes may be machine washable, but only follow that route if the maker’s care instructions explicitly allow it.
Does water ruin suede?
Water does not automatically ruin suede, but it can leave marks and stiffness if the shoe dries unevenly or near heat. Blot it, stuff the shoe, let it dry naturally at room temperature, then brush the nap back up.
What is the best thing to clean suede with?
For most dirt, a dry suede brush and a suede eraser handle the job. For stubborn marks, a cleaner labelled for suede, used as directed after a test on a hidden spot, is the next step. There is no single best product for every suede, so start with the gentlest option.
Can you use vinegar on suede?
Some people dab salt marks with a cloth barely dampened with diluted white vinegar. It is a common household method, not an official one. Test on a hidden spot, never soak the suede, and never mix vinegar with bleach or other cleaners.
How do you restore the nap on suede?
Brush flattened areas with the firmer side of a suede brush in short strokes, then finish with the soft side in one direction. For shiny patches, a suede eraser often helps first.
How often should you clean suede shoes?
A quick brush after each wear keeps dust from building up. Deeper cleaning is only needed when there is a mark or the shoes look dull overall. Reapply protector spray after a deep clean or as the label suggests.
Is nubuck cleaned the same way as suede?
Very similarly. Nubuck is generally described as buffed on the grain side rather than the flesh side, so its nap is usually finer. Use the same dry brushing, erasing and blotting, with a lighter hand.
Can suede shoes be stretched?
Leather and suede usually stretch a little; most synthetics barely do. A cobbler or a two-way shoe stretcher used over several days are the common options. See our guide on How to Stretch Shoes That Are Too Tight for more.
Shop the look on Amazon
Everything you need to build a secondhand-style wardrobe, delivered. We may earn a commission on purchases.
Browse picks on Amazon →Suede vs Nubuck
What suede and nubuck are.